Explore the blog
Tag:Embossing
Posts mit dem Label Embossing werden angezeigt. Alle Posts anzeigen
Donnerstag, 7. Mai 2020
- Werbung - 
Hi there!

Today I'm sharing a new encouragement card featuring stamps and dies from Penguin Palace.
I used the Classic Diamonds Backdrop stand-alone die and the My BFF stamp set. I also used the large Dots Meet Dashes Rectangles and the small Dots Meet Dashes Rectangles.
Here is a look at my card:


First I die cut white cardstock with the Classic Diamonds Backdrop die and then, die cut this portion again with the large Dots Meet Dashes die.


Next I die cut watercolor paper with one of the small Dots Meet Dashes dies and stamped the rainbow and the little butterfly from the BFF stamps with VersaMark. I embossed them with white embossing powder. The rainbow is perfect to encourage someone in these times.


Then I colored them in with Zig Clean Color Real Brush Marker. That took more time than I thought because of the little images. I also colored the area between the stamped images with a light yellow Zig marker.


Next I die cut the word "hope" with some alpha dies. I die cut each letter three times and glued them together to create more dimension.


I cut an A2 sized card base and glued the Diamonds Backdrop onto this card base. Then I adhered the word "hope" and applied a piece of yarn. Then I adhered this panel with foam tape.


I hope you like my card!

Thanks for stopping by and happy crafting!

Anja
If you like this post, be sure to follow my blog! (Buttons are in the sidebar on the right.) 
Donnerstag, 30. April 2020
- Werbung -

Hi there,

today I'm back with a new card with Penguin Palace!
My card is featuring the new Never Give Up stamps and coordinating Penguin Perfect Cuts with the cute kawaii sushi! I used the new Dots Meet Dashes dies, too!


To start I stamped the images and colored them in with my Copics. Then I die cut them with the coordinating Penguin Perfect Cuts.


Then, I made 3 layers for my card. For 2 layers I used new dies Dots Meet Dashes Large Rectangle Overlays: with the larger die I die cut pattern paper and with the smaller die I die cut white cardstock, which I ink blended with scattered straw and dried marigold Distress Oxide ink. For the third layer I cut white cardstock to underlay the ink blended layer.


I created my little scene and adhered the images with liquid glue. I had so much fun creating this sushi tower! Next, I cut a black stripe, stamped the sentiments with VersaMark and embossed it with white embossing powder. This is my go to for sentiments.


To finish off, I added white highlights with a gel pen.

I had so much fun creating this card and I hope you like it!


Thanks for stopping by and happy crafting!

Anja
If you like this post, be sure to follow my blog! (Buttons are in the sidebar on the right.) 
Donnerstag, 16. April 2020
- Werbung - 
Hi there!

Today I'm sharing a clean&simple card with the new release from Penguin PalaceMy card features the The Sweetest Truck stamp set, the coordinating
Penguin Perfect Cuts and the Dots Meet Dashes Large Rectangle Overlay Dies.


First I die cut white cardstock with the largest die from the Dots Meet Dashes dies. Then, I stamped out my images on Neenah cardstock, cut them out with the coordinating Penguin Perfect Cuts and colored them in with my Copics. I added highlight with a white gel pen.


Next, I created my background with the die cut portion. I masked a frame with purple tape and ink blended mustard seed, spiced marmelade and mowed lawn Distress Inks. These colors fit perfectly to my colored images.


I stamped the Happy Birthday sentiment with VersaMark on black cardstock, embossed it with white embossing powder and die cut it with a small banner die.

Then, I assembled my card. I used foam tape to adhere the images for more dimension on my card. Since I was still missing something on my card, I stamped the tiny stars and the little heart with mowed lawn and spiced marmelade Distress Inks onto my card. Also, I added Glossy Accents over the windows of the truck.


I hope you like my card!

Thanks for stopping by and happy crafting!

Anja
If you like this post, be sure to follow my blog! (Buttons are in the sidebar on the right.) 
Montag, 30. März 2020
- Werbung - 
Hi, everyone and welcome to the Penguin Palace New Release & Inspirational Chapter Day 1!

Today we are sharing projects with 2 new stamp sets and coordinating Penguin Perfect Cuts!

My first card is featuring the new "The More We Get Together" stamps and coordinating Penguin Perfect Cuts! This set includes so many images and the possibilities are endless! I love the sweet details like the die cut cave entrance or the cute faces.


I started by stamping out the cute images and colored them in with my Spectrum Noir Illustrator. I die cut them with the coordinating Penguin Perfect Cuts.


Next, I cut white cardstock to size for my card base and pattern paper for the card panel. I cut two more layers: one for my background and one for the sea bottom.
I ink blended blueprint sketch and mermaid lagoon Distress Oxide ink over the layer for my sea background. For the sea bottom I ink blended tea dye Distress Oxide Ink. Then I put some Liquid Stardust from Lawn Fawn on my glass mat and splattered them over it.


I adhered the images with liquid glue and with foam tape to add dimension. Next, I stamped the sentiment with VersaMark and embossed it with white embossing powder.


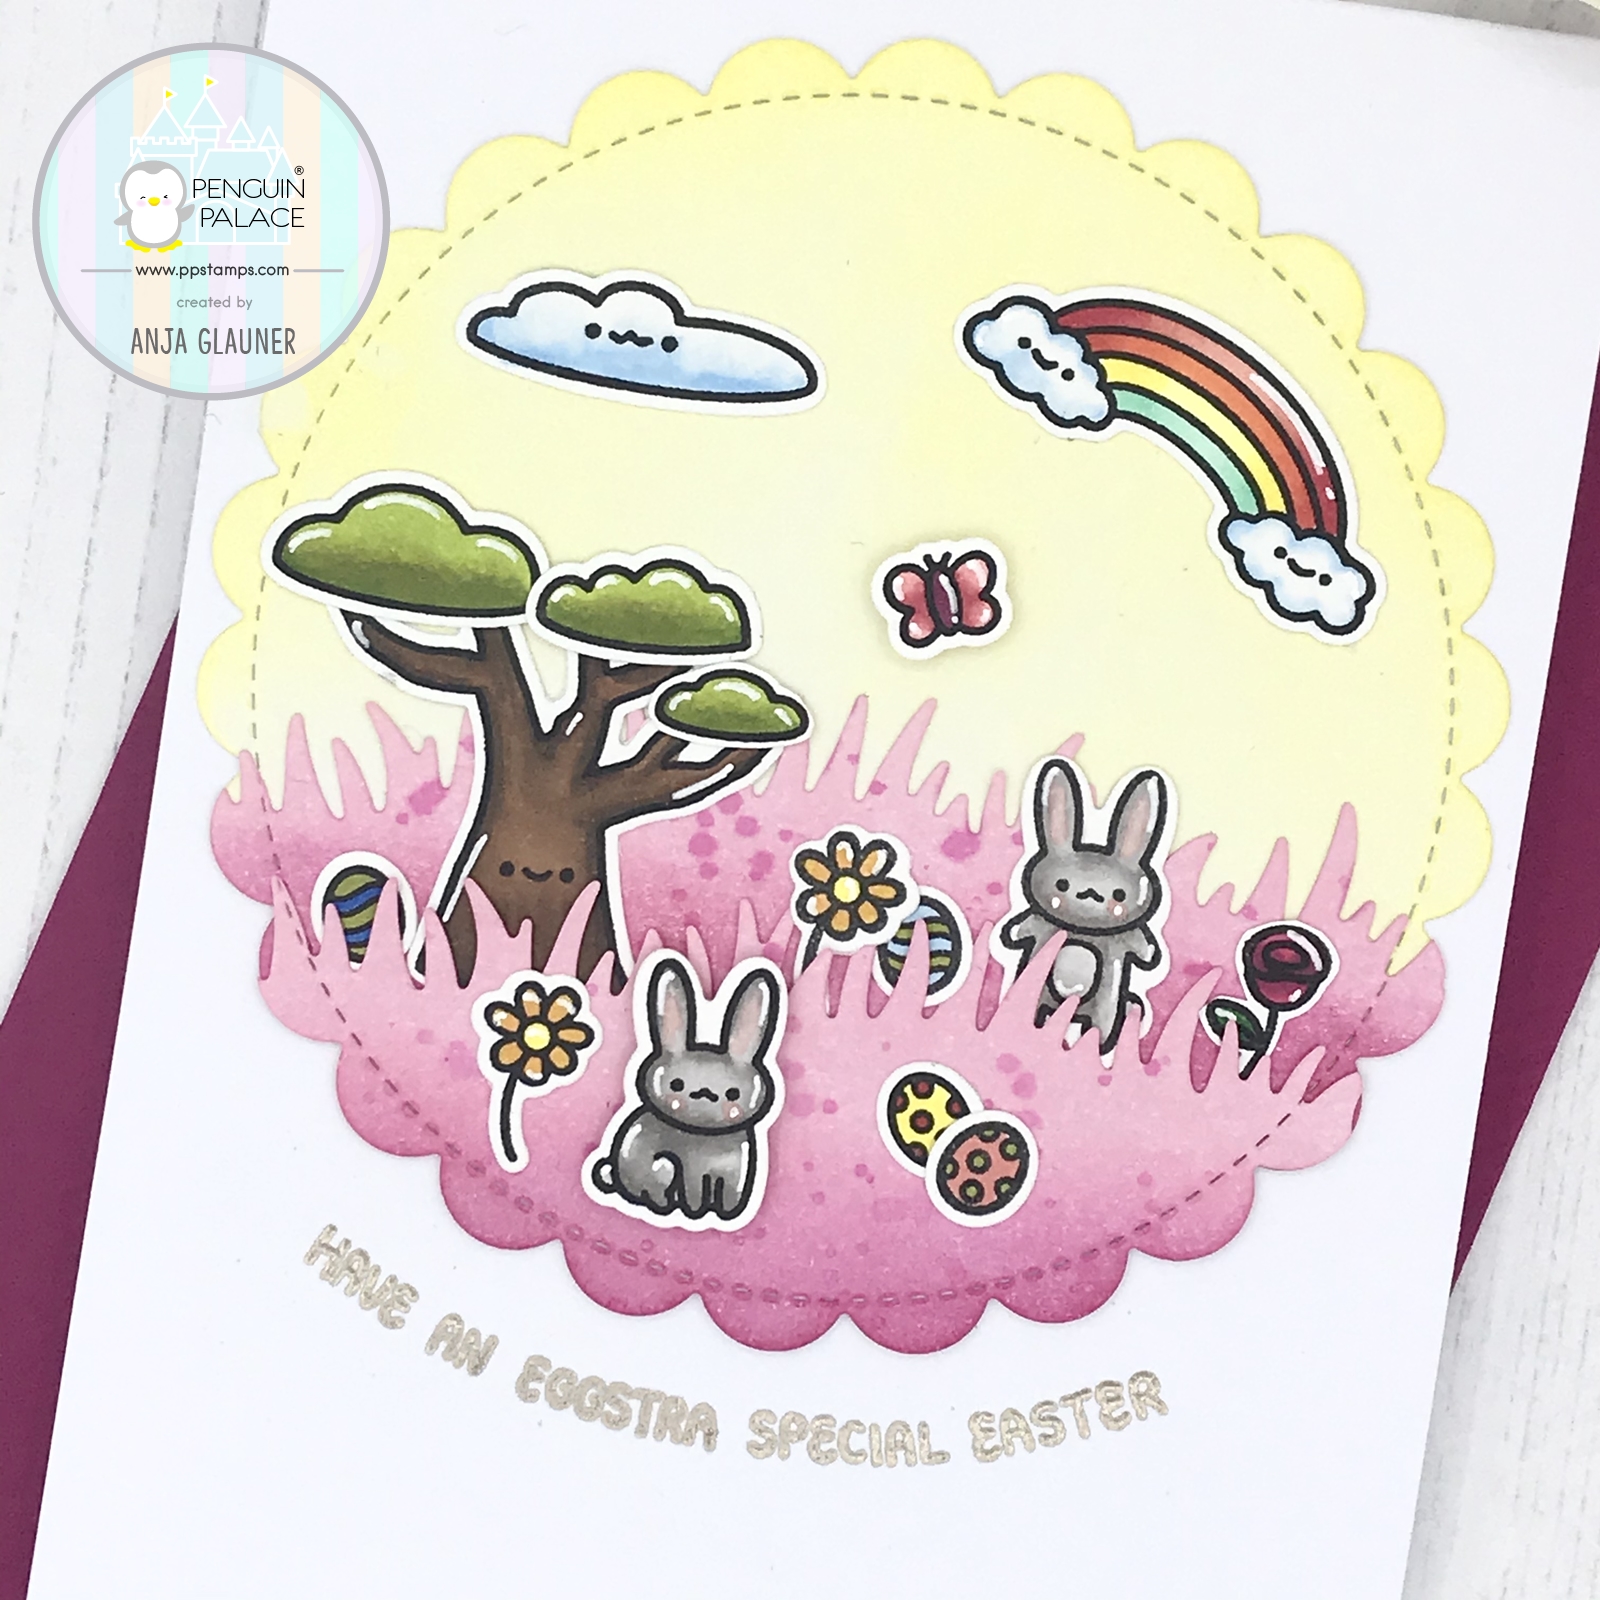
My second card is featuring the new "My BFF" stamps and coordinating Penguin Perfect Cuts and this set includes many adorable images! I love that you can make cards for different occasions with this set, for example: Easter, spring, friendship, encourage. I decided to make a Easter card with it!


I used the cloud, the rainbow, the tree with the leaves clusters, the butterfly, the flowers, the bunnies and the eggs for my card. I stamped them out and colored them in with my Spectrum Noir Illustrator. Then I die cut them with the coordination Penguin Perfect Cuts.


I die cut 3 scalloped circles. Two of them were run again through my Big Shot with grass boarder dies. I did some ink blending with Distress Inks and used squeezed lemonade, picked raspberry and spun sugar.


I glued the die cut portions to a white card base and adhered the images with a mix of liquid glue and foam tape to create dimension. To finish off, I stamped the sentiment with VersaMark and embossed it with Platinum embossing powder.

I had so much fun creating these cards and I hope you like them!

Be sure to check the Penguin Palace blog to see the projects of the other DT members too!


We will see you tomorrow with another new products of this new release!

Thanks for stopping by and happy crafting!

Anja
If you like this post, be sure to follow my blog! (Buttons are in the sidebar on the right.) 
Freitag, 21. Februar 2020
- Werbung - 
Hi, everyone!

Today I'm sharing this new card I made using the Fun Night Out stamps and coordinating Penguin Perfect Cuts from Penguin Palace. I also used Cross Stitched and Dots Small Rectangle Overlay Dies, Cross Stitched and Dots Large Rectangle Overlay Dies, Home Sweet Home Die and Cyber Wallpaper stencil.


I started by stamping out the cute images and colored them in with my Spectrum Noir Illustrator. I die cut them with the coordinating Penguin Perfect Cuts and added highlights with a white gel pen.

Next, I cut white cardstock to size for my card base and the card panel. Then I used the rectangle overlay dies to die cut a frame. I had the idea that my scene should represent a disco from inside. Therefore I die cut a background with the Home Sweet Home die.


Then, I did some ink blending. For the background which you can see through the windows I ink blended chipped saphire Distress Ink and splattered gold ink for the stars over it. For the wall inside the disco I ink blended victorian velvet Distress Oxide Ink over the Cyber Wallpaper stencil. I chose tumbled glass Distress Ink for the floor.


Next, I stamped the sentiment with VersaMark and embossed ith with white embossing powder on dark blue cardstock.


To finish off, I assembled my card. I adhered my images with foam tape and liquid glue to create dimension.

I hope you like my card! Thanks for stopping by and happy crafting!

Anja
If you like this post, be sure to follow my blog! (Buttons are in the sidebar on the right.) 
Freitag, 24. Januar 2020
- Werbung - 
Hi, everyone!

Today I'm sharing this new slimline card I made using the Rabbit Cafe stamps and Penguin Perfect Cuts from Penguin Palace. It took me hours, but I'm happy with the result!


I started by stamping out the all cute images and colored them in with my Spectrum Noir Illustrator. I die cut them with the coordinating Penguin Perfect Cuts and added highlights with a white gel pen.

Next, I die cut my layers and cut white cardstock to size for my card base. Then I used a stencil and Distress Oxide Inks to create the background. I masked the top of the layer and ink blended over my stencil using pumice stone Distress Oxide Ink. Next I removed my masking tape from the top of this layer and ink blended this portion with dried marigold Distress Oxide Ink. Then I watered down two different golden colors from the Gansai Tambio Starry Colors on my glass mat and splattered them over the entire ink blended portion.


I glued the two layers to my card base and designed my scene. It was a longer process to find the right position of my stamped images!
After I was satisfied with the final version, I glued the images on my card. The images in the foreground were adhered with foam tape to create dimension.


To finish off, I stamped the sentiment with VersaMark and embossed it with gold embossing powder on a strip of cardstock and glued it to my card.


I just love the cute characters from Rabbit Cafe and I hope you too!


Thanks for stopping by and happy crafting!

Anja
If you like this post, be sure to follow my blog! (Buttons are in the sidebar on the right.) 
Freitag, 17. Januar 2020
- Werbung - 
Hi, everyone!

Today I'm sharing this new card I made using the Lucky Break stamps and Penguin Perfect Cuts and Cyber Wallpaper - Penguin Perfect Patterns designer stencil from Penguin Palace.


I started by stamping out the cute images and colored them in with my Spectrum Noir Illustrator. I stamped "Jackpot!" with VersaMark and embossed it with gold embossing powder. I colored the coins in with a clear embossing pen and embossed them also with gold embossing powder for a realistic look! I die cut all the images with the coordinating Penguin Perfect Cuts and added highlights with a white gel pen.


Next, I cut white cardstock to size for my card base and the card panel. I did ink blending over the card panel using Distress Oxide in Salty Ocean. Next I took the Cyber Wallpaper stencil, put it onto my ink blended card panel and ink blended Distress Oxide in Salty Ocean over the top. Then I smooshed the color on my glass mat, watered it down and splattered it over the ink blended portion.


I glued my card panel to my card base and stamped the sentiment with black ink.


To finish off, I adhered all of my images with foam tape, added Glossy Accents and added some little blue stars.


I hope you like my card!

Thanks for stopping by and happy crafting!

Anja
If you like this post, be sure to follow my blog! (Buttons are in the sidebar on the right.) 
Freitag, 10. Januar 2020
- Werbung - 
Hi, everyone!

Today I'm sharing this new card I made using the Rabbit Cafe and Penguin Perfect Cuts from Penguin Palace. I also used the pretty Rain of Hearts stencil and Cross Stitched and Dots Large Rectangle Overlays and the Small Rectangle Overlays stand-alone dies.


I started by stamping out the images and colored them in with my Spectrum Noir Illustrator. I die cut them with the coordinating Penguin Perfect Cuts and added highlights with a white gel pen.

Next, I cut white cardstock to size for my card base. Then I used 3 different dies from the stand-alone dies and pattern paper for 2 layers and white cardstock for the third layer. I took the third white layer and the stencil and blend VersaMark over it. Next I embossed this with Bonding Powder and foiled it with WOW Fab Foil. I love the effect!


I glued the 3 layers to my card base and stamped the sentiment on a piece of the pattern paper.


To finish off, I adhered all the sweet girl, the clouds and the sentiment with foam tape. I just love my card and I hope you too!


Thanks for stopping by and happy crafting!

Anja
If you like this post, be sure to follow my blog! (Buttons are in the sidebar on the right.) 
Samstag, 23. November 2019
- Werbung - 
Hi there!

Today I'm sharing a card with the latest release from Penguin Palace. I used Cyber Wallpaper - Penguin Perfect Patterns Designer Stencil and the Fun Night Out stamp set and coordinating
Penguin Perfect Cuts!


First I cut my card panel and took the Cyber Wallpaper stencil. I ink blended VersaMark ink over the top and embossed it with WOW embossing powder. It has such a glamorous look!


Next I took Neenah cardstock and stamped out the images. I colored them in with my Spectrum Noir Illustrator markers and added highlights with a white gel pen. I cut them with the coordinating Penguin Perfect Cuts.


For the sentiment I chose a grey ink which fits perfect to the grey cat. I love that there's a coordinating die for the "SHAKE"!


I adhered all images with foam tape. To finish off, I added Wink of Stella over the mirror ball.

I hope you like my card!

Thanks for stopping by and happy crafting!

Anja
If you like this post, be sure to follow my blog! (Buttons are in the sidebar on the right.) 
Samstag, 19. Oktober 2019
- Werbung - 

Hello and welcome back to Penguin Palace's October New Release & Creativity Chapter Day 6!

Today I'm sharing a card with the new Stencil Crystal Snowflakes from Penguin PalaceHere's a look at my cards:


I also used Cuddly Sheep's Season's Greetings stamp set and coordinating
Penguin Perfect Cuts!

For my first card I ink blended cracked pistachio, peacock feathers and blueprint sketch Distress Oxide inks.


I splattered some water onto the ink blended card base and soaked it up with paper towel. Next I took the stencil and applied Aleene's True Snow over the top.

While the background was drying, I stamped out the images, cut them out with the coordinating dies and embossed the sentiment.


For my second card I decided to switch from high to landscape format.


For this card I ink blended wilted violet, seedless preserves and picked raspberry Distress Oxide inks.


I hope you like my card!

Thanks for stopping by and happy crafting!

Anja
If you like this post, be sure to follow my blog! (Buttons are in the sidebar on the right.) 

@stampinanja

Latest Pins