Explore the blog
Tag:Design Team
Posts mit dem Label Design Team werden angezeigt. Alle Posts anzeigen
Donnerstag, 7. Januar 2021

 {Werbung - Design Team Projekt}

Hallo ihr Lieben,


zum (Re-)Start gibt es heute gleich mal einen zweiten Post!


Ich habe mit dieser niedlichen Truppe von Paperie Ink eine Slimline-Karte zum Geburtstag gestaltet! Die Distress Oxide Kombi habe ich neu entdeckt und mag sie aktuell sehr! Cracked pistachio, tumbled glass und peacock feathers sind die Farben!


Für mich geht es jetzt noch ein Ründchen raus, dann ist schneller Abend. Nach langen 10 Monaten Warterei beginnt heute nämlich die neue Bergdoktor Staffel! Wer guckt noch? Outet euch!😁

Alles Liebe euch!

Anja


Donnerstag, 29. Oktober 2020

  - Werbung/Ad -
*Affiliate Links Used

Hi and welcome back!

Today I'm sharing a new card with products from Penguin Palace!


My card features the new Hello Sunshine Stencils 360° TM!


First I die cut my 4 1/4" x 5 1/2" card panel with the Cross Stitched and Dots Large Rectangles Overlays.
Then I picked up the Barrel 1. I ink blended Peacock Feathers Distress Ink with a turning interval of 15 °. In a second round I created my own turning interval and ink blended Seedless Preserves Distress Ink.


Next, I die cut a circle with the circular die from Words From The Heart (Chapters 1&2) Coordinating Penguin Perfect Cuts. I then die cut the Never Lose Hope Shadow sentiment. I inked the heart of the die cut sentiment with Versamarker and embossed it with silver embossing powder.


To finish off, I assembled my card using foam tape to create dimension.


I hope you like my card!

Thanks for stopping by and happy crafting!

Anja
If you like this post, be sure to follow my blog! (Buttons are in the sidebar on the right.) 
Donnerstag, 22. Oktober 2020

 - Werbung/Ad -
*Affiliate Links Used

Hi and welcome back!

Today I'm sharing a new card with products from Penguin Palace!


My card features the new Magical Fireworks Stencils 360° TM!

First I die cut my 4 1/4" x 5 1/2" dark blue card panel with the Dots Meet Dashes Large Rectangles Overlays.
Then I picked up the Barrel 2. I used my own turning interval because I wanted to have a continuous pattern and blended Lawn Fawn Yeti ink onto my card panel.


Then I stamped out my images from Cuddly Sheep's Season's Greetings and die cut them with the Coordinating Penguin Perfect Cuts. I colored them in with my Copic Sketch markers.


For the background of my little scene I die cut two circles with the circular die from Words From The Heart (Chapters 1&2) Coordinating Penguin Perfect Cuts. I then die cut one of these circles with a border die for the snow ground. I ink blended the other circle portion with Peacock Feathers Distress Oxide Ink and splattered some water.


To finish off, I assembled my card using foam tape to create dimension.

I hope you like my card!

Thanks for stopping by and happy crafting!

Anja
If you like this post, be sure to follow my blog! (Buttons are in the sidebar on the right.) 
Donnerstag, 15. Oktober 2020

                                                                                         - Werbung/Ad -

*Affiliate Links Used

Hi and welcome back!

Today I'm sharing a new card with products from Penguin Palace!


My card features the new Floral Wreath Stencils 360° TM!

First I die cut my 4 1/4" x 5 1/2" card panel with the Dots Meet Dashes Large Rectangles Overlays.
Then I picked up the Single Barrel TM. I used a turning interval of 45° and blended a combination of Mowed Lawn, Bundled Sage, Dried Marigold, Worn Lipstick and Speckled Egg Distress Oxide inks onto my card panel.


Then I stamped a sentiment from Words From The Heart (Chapter 2) using Mowed Lawn and Dried Marigold Distress Oxide inks. This sentiment was then die cut using a circular die from Words From The Heart (Chapters 1&2) Coordinating Penguin Perfect Cuts.

Next I die cut another piece using matching cardstock with the hexagon die from Words From The Heart (Chapters 1&2) Coordinating Penguin Perfect Cuts.


To finish off, I assembled my card using liquid glue. I adhered the sentiment with foam tape to create dimension.


I hope you like my card!

Thanks for stopping by and happy crafting!

Anja
If you like this post, be sure to follow my blog! (Buttons are in the sidebar on the right.) 
Donnerstag, 8. Oktober 2020

 - Werbung/Ad -
*Affiliate Links Used

Hi and welcome back!

Today I'm sharing a new card with products from Penguin Palace!

My card features the new Sacred Lotus Stencils 360° TM and I created a Christmas card with them!


I first used Barrel 2 on my 4 1/4" x 5 1/2" card panel (I die cut my card panel with the Dots Meet Dashes Large Rectangles Overlays) and ink blended festive berries Distress Oxide ink in the first round. in The second round I ink blended aged mahogany Distress Oxide ink over Barrel 2.

I then used Barrel 1 and applied Nuvo Embellishment Mousse Black Ashh with a Nuvo Blending Sponge.


Next, I stamped the Merry X'mas stamp from Warmest Wishes with aged mahogany Distress Oxide ink and die cut it with the Warmest Wishes and Heartfelt Notes Coordinating Penguin Perfect Cuts.

To pick up the color of the Embellishment Mousse again, I die cut a matching cardstock with another die from the Warmest Wishes and Heartfelt Notes Coordinating Penguin Perfect Cuts.


To finish off, I adhered the sentiment with foam tape onto my card and added some snowflake embellishments.

I hope you like my card!

Thanks for stopping by and happy crafting!

Anja
If you like this post, be sure to follow my blog! (Buttons are in the sidebar on the right.) 
Donnerstag, 2. Juli 2020
- Werbung/Ad - 

Hi and welcome to a new blog post!

Today I'm sharing a new card that I made using several stamp sets from Penguin Palace Stamps!


I used 5 stamp sets! That's what I love about Penguin Palace's products! They are so easy to combine with each other!
I used:

The Sweetest Truck & Penguin Perfect Cuts
Never Give Up & Penguin Perfect Cuts
My BFF & Penguin Perfect Cuts
Summer Sunshine & Penguin Perfect Cuts
Bee Happy & Penguin Perfect Cuts

I began this card by die cutting my card panels. I used slimline dies from Trinity Stamps. I die cut 3 stitched slimline panels and 2 of them were die cut with grassy hill border dies.
I ink blended tumbled glass Distress Oxide Ink over the stitched panel. Then I ink blended mowed lawn and shabby shutters Distress Oxide Inks over the grassy borders.


Next I stamped out all the images from the 5 stamp sets and colored them in with my Copic Sketch markers. This took me hours and hours! After coloring I die cut them with the coordinating Penguin Perfect Cuts and added white dotted highlights to the images.


To finish off, I assembled my card! I used liquid glue and foam tape to create dimension on my card.

Creating such a big scene is always exciting - you never know what will be created at the end, because you always change your ideas!


I hope you like my card!

Thanks for stopping by and happy crafting!

Anja
If you like this post, be sure to follow my blog! (Buttons are in the sidebar on the right.) 
Donnerstag, 25. Juni 2020
Hi there!

Today I'm sharing a cute card that I made using The Sweetest Truck from Penguin Palace


I began this card by die cutting two card panels with the Dots Meet Dashes Large Rectangles Overlays dies. With the larger die I cut an A2 sized panel with pattern paper and with the smaller die I cut white cardstock.


Next, I took a heart die and cut masking paper with it. I put the negative of the die cut onto my white panel. Then, I stamped out many little images from The Sweetest Truck to fill this heart. I colored them in with my Copic Sketch markers. I also stamped the little girl and a donut and cut them out with the coordinating Penguin Perfect Cuts. After coloring the little girl, I added highlights with a white gel pen.


I chose a sentiment from the Rabbit Cafe, which goes so well with my card!

To finish off, I assembled my card and adhered the little girl with foam tape.


That's it!

I hope you like my card!

Thanks for stopping by and happy crafting!

Anja
If you like this post, be sure to follow my blog! (Buttons are in the sidebar on the right.) 
Donnerstag, 18. Juni 2020
- Werbung - 
Hi there!

Today I'm sharing a fun wobble card that I made using The More We Get Together from Penguin Palace


I began this card by stamping images from this stamp set. I colored them in with my Copic markers before die cutting them with the coordinating Penguin Perfect Cuts.

I used the largest dies from the Dots Meet Dashes Large Rectangles Overlays and the Cross Stitched and Dots Large Ractangles Overlays to cut two panels. Then I cut the Dots Meet Dashes panel with a wave border die from My Favorite Things.


I ink blended the Cross Stitched and Dots panel with squeezed lemonade Distress Oxide ink. Next I used a stencil from My Favorite Things and ink blended squeezed lemonade Distress Oxide ink over it to mimic sunrays. This time with more pressure for a brighter ink blending.
I ink blended mermaid lagoon and broken china Distress Oxide inks over the other panel. Then I used again the stencil and ink blended white pigment ink for the reflection of the sunrays in the ocean.


I glued the panels onto an A2 sized card base and stamped the sentiment with Versafine ink. Then I played with the images to look how I could create my scene. I adhered them with liquid glue and with foam tape to create dimension. I had the idea to put the sweet cat onto an action wobbler for some extra on my card!
Here you can see the wobbler in action:


I hope you like my card!


Thanks for stopping by and happy crafting!

Anja
If you like this post, be sure to follow my blog! (Buttons are in the sidebar on the right.) 
Donnerstag, 11. Juni 2020
- Werbung - 
Hi there!

Today I'm sharing a new card using There's No One Like You stamps and coordinating Penguin Perfect Cuts from Penguin Palace
Here's a look at my card.


First I cut white cardstock for my card base. Then, I cut a smaller piece of white cardstock for the card panel.

Next I took Neenah cardstock and stamped out the images. I colored them in with my Copic Sketch markers and cut them out with the coordinating Penguin Perfect Cuts. I chose soft colors for the coloring of tea sets and the cappuccino. The cute different faces are stamped onto the images. I like how you can change the images to these cute charcaters with these faces. 
I stamped the steam with VersaMark on vellum and embossed it with white embossing powder.


In the next step, I ink blended picked raspberry and worn lipstick Distress Oxide ink over the white panel and adhered this panel with foam tape to the card base. I arranged all the images and glued them down with liquid glue.


Then, I stamped the sentiment with my misti tool and finished off by adding different sequins/embellishments to my card.


I like how my card turned out! The pink background gives the perfect contrast to the soft colored images.


I hope you like my card too!

Thanks for stopping by and happy crafting!

Anja
If you like this post, be sure to follow my blog! (Buttons are in the sidebar on the right.) 
Donnerstag, 4. Juni 2020
- Werbung - 
Hi everyone!

Today I'm sharing a new card featuring stamps and dies from Penguin Palace. I used three different stamp sets on my card! Here is an overview of my used products:

The Sweetest Truck & coordinating Penguin Perfect Cuts
Rabbit Cafe & coordinating Penguin Perfect Cuts
There's No One Like You
Dots Meet Dashes Large Rectangles Overlays

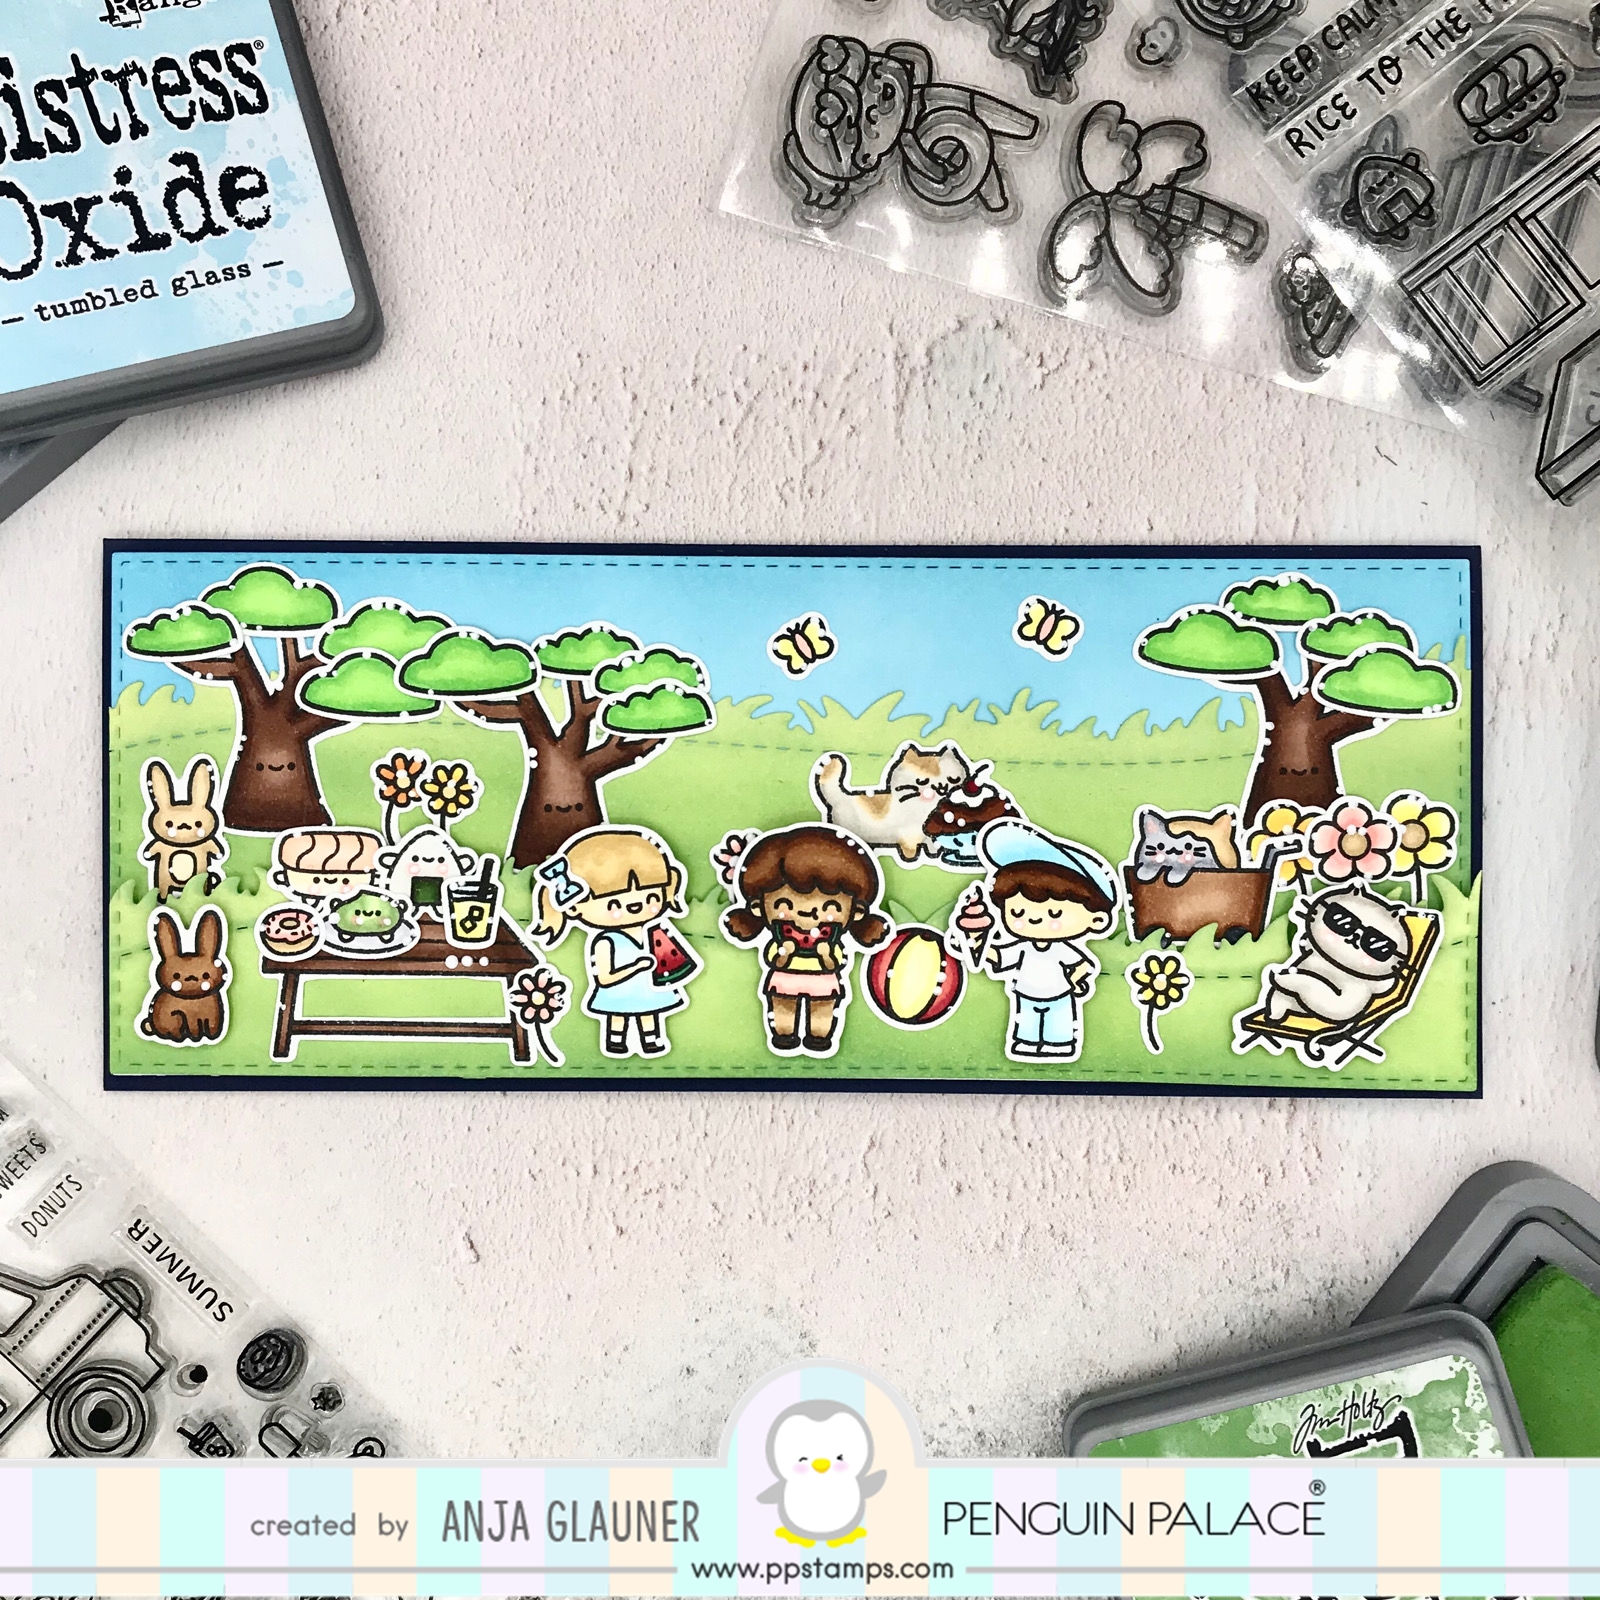
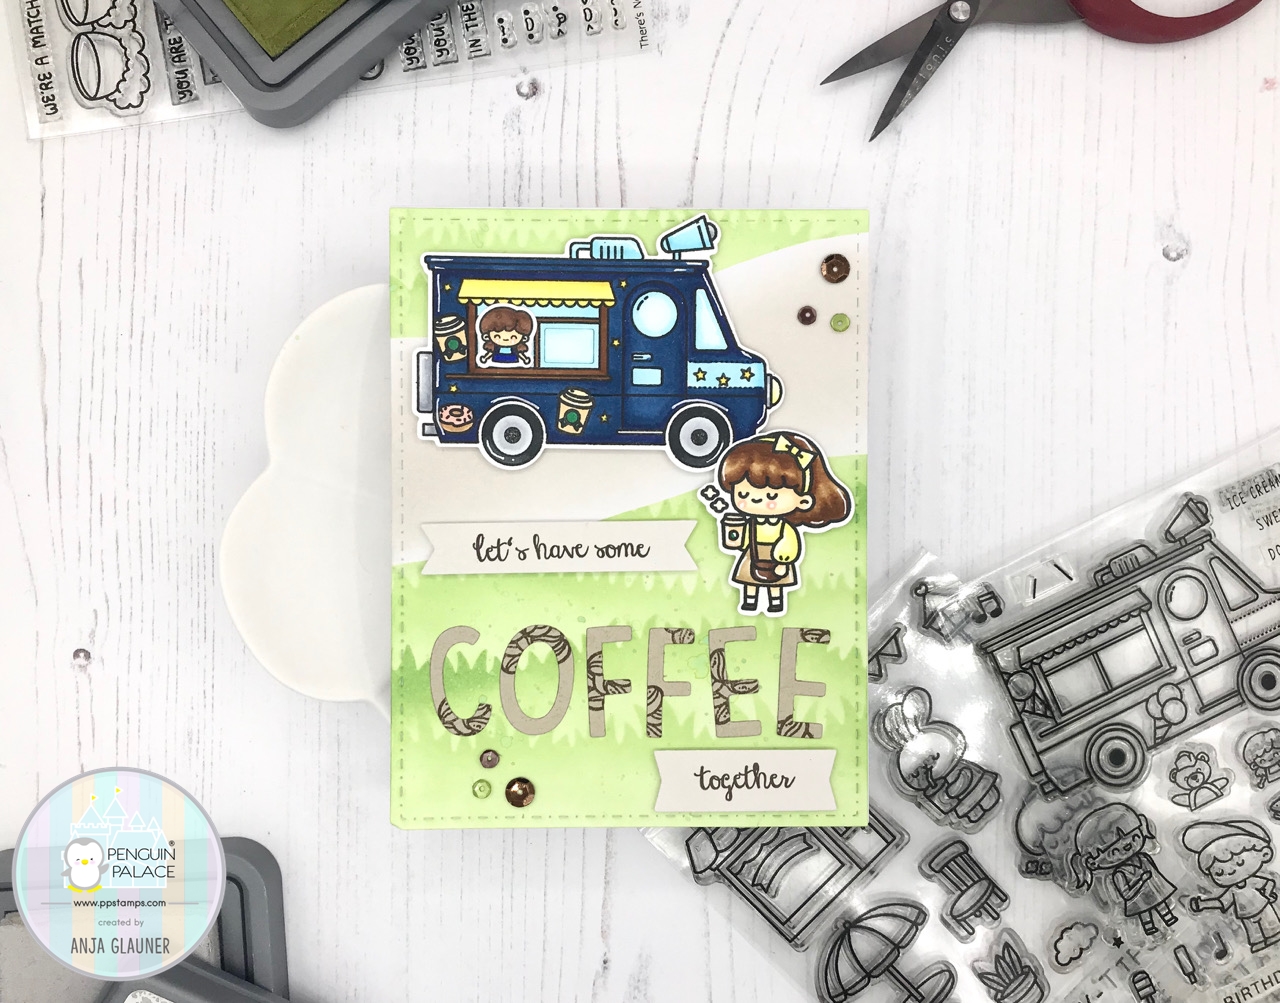
And here is a lookt at my card:


First I stamped out the images on Neenah cardstock and colored them in with my Copic markers. I did some masking on the truck, because I wanted to create a coffee truck. Then, I die cut them with the coordinating Penguin Perfect Cuts.


Next, I die cut the card panel with the largest die from the Dots Meet Dashes Rectangles. I cut a mask for a path with my scissor and ink blended mowed lawn Distress Oxide ink over a grassy border stencil. Then, I removed my mask and ink blended pumice stone Distress Oxide ink.


For my sentiment I die cut "Coffee" with alpha dies from Lawn Fawn and stamped the coffee beans from the There's No One Like You stamp set with brown ink onto the alphas. I stamped "let's have some" and "together" with the same brown ink and die cut them with banner dies.


Then, I assembled my card. I adhered the images and the banners with foam tape and the "Coffee" alphas with liquid glue. After glueing the card panel to the card base, I added some sequins to my card and added white highlights with a gel pen.


I hope you like my card!

Thanks for stopping by and happy crafting!

Anja
If you like this post, be sure to follow my blog! (Buttons are in the sidebar on the right.) 
Donnerstag, 28. Mai 2020
- Werbung - 
Hi there!

Today I'm sharing a cute shaker card with Penguin Palace featuring  The More We Get Together stamps and coordinating Penguin Perfect Cuts.


Next I took Neenah cardstock and stamped out the images. I colored them in with my Copic Sketch markers and cut them with the coordinating Penguin Perfect Cuts.


Then I die cut two slimline card panels. One of them with two windows for my shaker element. I also die cut this panel with an ocean wave border die. I ink blended blueprint sketch Distress oxide ink over the first panel and peacock feather Distress Oxide ink over the second panel with the windows.


Next I glued acetate behin the two windos and adhered foam tape as a frame around the back of the windows. I filled them with different sequins and shaker mixes and then adhered another piece of acetate to close the shaker elements.

I put the card base and the card panels together and adhered my stamped images with liquid glue and foam tape.


I die cut the sentiment with black cardstock and glued it onto the background.

To finish off, I added white highlights with a gel pen and added some drops/sequins to the top of my card.


I hope you like my card!

Thanks for stopping by and happy crafting!

Anja
If you like this post, be sure to follow my blog! (Buttons are in the sidebar on the right.) 

@stampinanja

Latest Pins