Explore the blog
Donnerstag, 18. Juni 2020
- Werbung - 
Hi there!

Today I'm sharing a fun wobble card that I made using The More We Get Together from Penguin Palace. 


I began this card by stamping images from this stamp set. I colored them in with my Copic markers before die cutting them with the coordinating Penguin Perfect Cuts.

I used the largest dies from the Dots Meet Dashes Large Rectangles Overlays and the Cross Stitched and Dots Large Ractangles Overlays to cut two panels. Then I cut the Dots Meet Dashes panel with a wave border die from My Favorite Things.


I ink blended the Cross Stitched and Dots panel with squeezed lemonade Distress Oxide ink. Next I used a stencil from My Favorite Things and ink blended squeezed lemonade Distress Oxide ink over it to mimic sunrays. This time with more pressure for a brighter ink blending.
I ink blended mermaid lagoon and broken china Distress Oxide inks over the other panel. Then I used again the stencil and ink blended white pigment ink for the reflection of the sunrays in the ocean.


I glued the panels onto an A2 sized card base and stamped the sentiment with Versafine ink. Then I played with the images to look how I could create my scene. I adhered them with liquid glue and with foam tape to create dimension. I had the idea to put the sweet cat onto an action wobbler for some extra on my card!
Here you can see the wobbler in action:


I hope you like my card!


Thanks for stopping by and happy crafting!

Anja
If you like this post, be sure to follow my blog! (Buttons are in the sidebar on the right.) ♥
Donnerstag, 11. Juni 2020
- Werbung - 
Hi there!

Today I'm sharing a new card using There's No One Like You stamps and coordinating Penguin Perfect Cuts from Penguin Palace. 
Here's a look at my card.


First I cut white cardstock for my card base. Then, I cut a smaller piece of white cardstock for the card panel.

Next I took Neenah cardstock and stamped out the images. I colored them in with my Copic Sketch markers and cut them out with the coordinating Penguin Perfect Cuts. I chose soft colors for the coloring of tea sets and the cappuccino. The cute different faces are stamped onto the images. I like how you can change the images to these cute charcaters with these faces. 
I stamped the steam with VersaMark on vellum and embossed it with white embossing powder.


In the next step, I ink blended picked raspberry and worn lipstick Distress Oxide ink over the white panel and adhered this panel with foam tape to the card base. I arranged all the images and glued them down with liquid glue.


Then, I stamped the sentiment with my misti tool and finished off by adding different sequins/embellishments to my card.


I like how my card turned out! The pink background gives the perfect contrast to the soft colored images.


I hope you like my card too!

Thanks for stopping by and happy crafting!

Anja
If you like this post, be sure to follow my blog! (Buttons are in the sidebar on the right.) ♥
Donnerstag, 4. Juni 2020
- Werbung - 
Hi everyone!

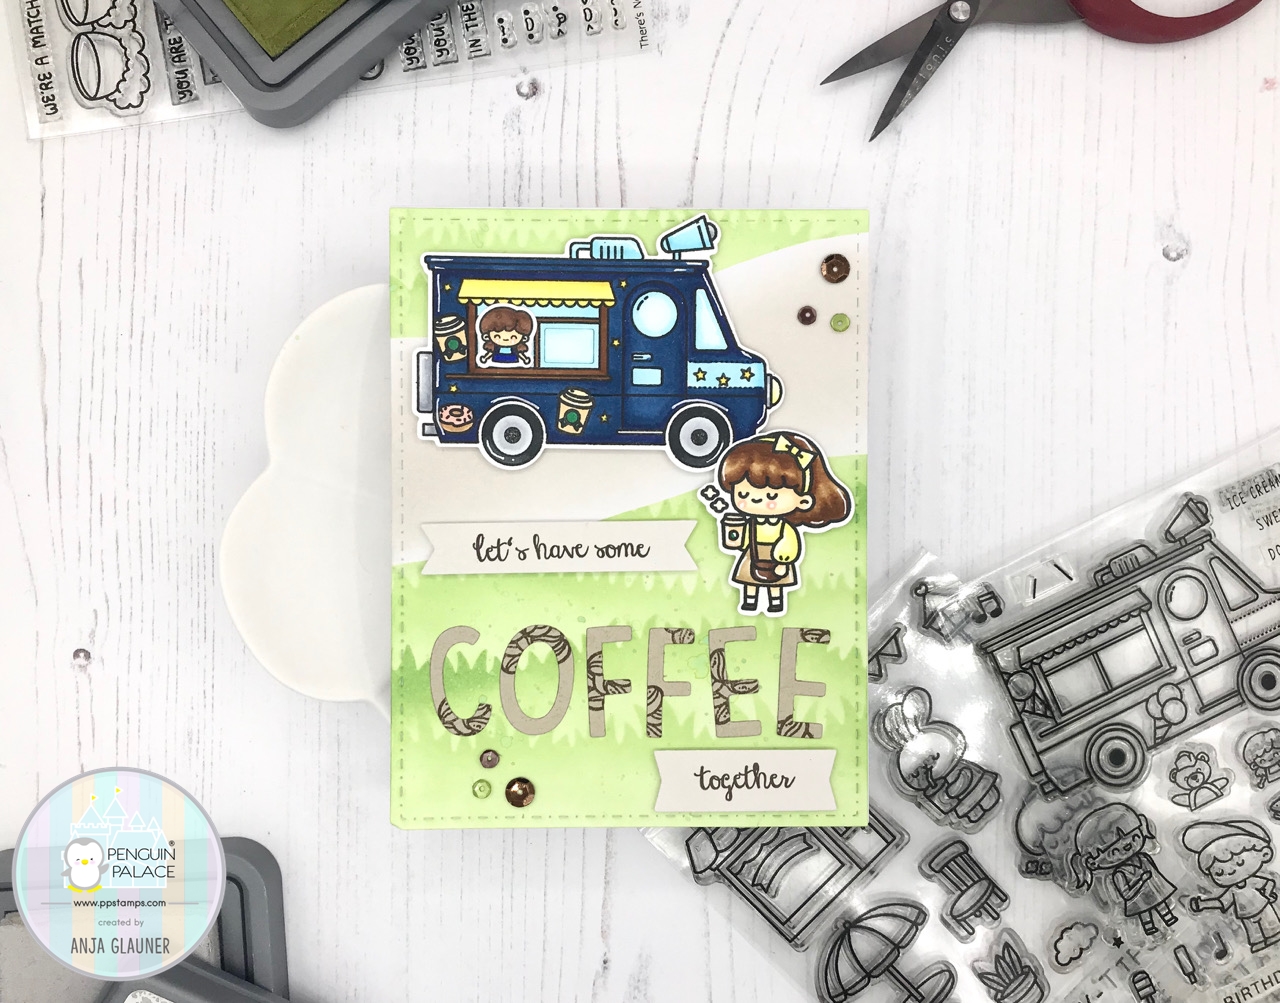
Today I'm sharing a new card featuring stamps and dies from Penguin Palace. I used three different stamp sets on my card! Here is an overview of my used products:

The Sweetest Truck & coordinating Penguin Perfect Cuts
Rabbit Cafe & coordinating Penguin Perfect Cuts
There's No One Like You
Dots Meet Dashes Large Rectangles Overlays

And here is a lookt at my card:


First I stamped out the images on Neenah cardstock and colored them in with my Copic markers. I did some masking on the truck, because I wanted to create a coffee truck. Then, I die cut them with the coordinating Penguin Perfect Cuts.


Next, I die cut the card panel with the largest die from the Dots Meet Dashes Rectangles. I cut a mask for a path with my scissor and ink blended mowed lawn Distress Oxide ink over a grassy border stencil. Then, I removed my mask and ink blended pumice stone Distress Oxide ink.


For my sentiment I die cut "Coffee" with alpha dies from Lawn Fawn and stamped the coffee beans from the There's No One Like You stamp set with brown ink onto the alphas. I stamped "let's have some" and "together" with the same brown ink and die cut them with banner dies.


Then, I assembled my card. I adhered the images and the banners with foam tape and the "Coffee" alphas with liquid glue. After glueing the card panel to the card base, I added some sequins to my card and added white highlights with a gel pen.


I hope you like my card!

Thanks for stopping by and happy crafting!

Anja
If you like this post, be sure to follow my blog! (Buttons are in the sidebar on the right.) ♥
Donnerstag, 28. Mai 2020
- Werbung - 
Hi there!

Today I'm sharing a cute shaker card with Penguin Palace featuring  The More We Get Together stamps and coordinating Penguin Perfect Cuts.


Next I took Neenah cardstock and stamped out the images. I colored them in with my Copic Sketch markers and cut them with the coordinating Penguin Perfect Cuts.


Then I die cut two slimline card panels. One of them with two windows for my shaker element. I also die cut this panel with an ocean wave border die. I ink blended blueprint sketch Distress oxide ink over the first panel and peacock feather Distress Oxide ink over the second panel with the windows.


Next I glued acetate behin the two windos and adhered foam tape as a frame around the back of the windows. I filled them with different sequins and shaker mixes and then adhered another piece of acetate to close the shaker elements.

I put the card base and the card panels together and adhered my stamped images with liquid glue and foam tape.


I die cut the sentiment with black cardstock and glued it onto the background.

To finish off, I added white highlights with a gel pen and added some drops/sequins to the top of my card.


I hope you like my card!

Thanks for stopping by and happy crafting!

Anja
If you like this post, be sure to follow my blog! (Buttons are in the sidebar on the right.) ♥
Donnerstag, 21. Mai 2020
- Werbung - 
Hi there!

Today I'm sharing a new card featuring stamps and dies from Penguin Palace.
I used the Classic Diamonds Backdrop stand-alone die and the There's No One Like You stamp set & coordinating Penguin Perfect Cuts. I also used the large Dots Meet Dashes Rectangles and the small Dots Meet Dashes Rectangles.
Here is a look at my card:


First I die cut white cardstock with the Classic Diamonds Backdrop die and then, die cut this portion again with the large Dots Meet Dashes die. With one of the small Dots Meet Dashes Rectangles die I die cut white cardstock twice.


Next, I stamped out the images on Neenah cardstock, colored them in with my Copics and cut them out with the coordinating Penguin Perfect Cuts. I stamped the tray again, but this time on pattern paper because I wanted to do paper piercing with it. I fuzzy cut the inside of the tray and glued it to the other tray which I stamped on Neenah cardstock. I stamped the steam for the tea with VersaMark on vellum and embossed it with white embossing powder.


The next step was the ink blending and smooching on the two die cut pieces. For one of the two pieces I used brown Harmony Ink from Spectrum Noir and for the other I used picked raspberry and worn lipstick Distress Oxide inks.


Then, I adhered the stamped images with foam tape to the pink background and stamped the sentiment with Versafine.

To finish off, I cut an A2 sized card base and glued the Diamonds Backdrop onto this card base. I adhered the two inked panels with liquid glue.


I hope you like my card!

Thanks for stopping by and happy crafting!

Anja
If you like this post, be sure to follow my blog! (Buttons are in the sidebar on the right.) ♥
Donnerstag, 14. Mai 2020
- Werbung - 
Hi there!

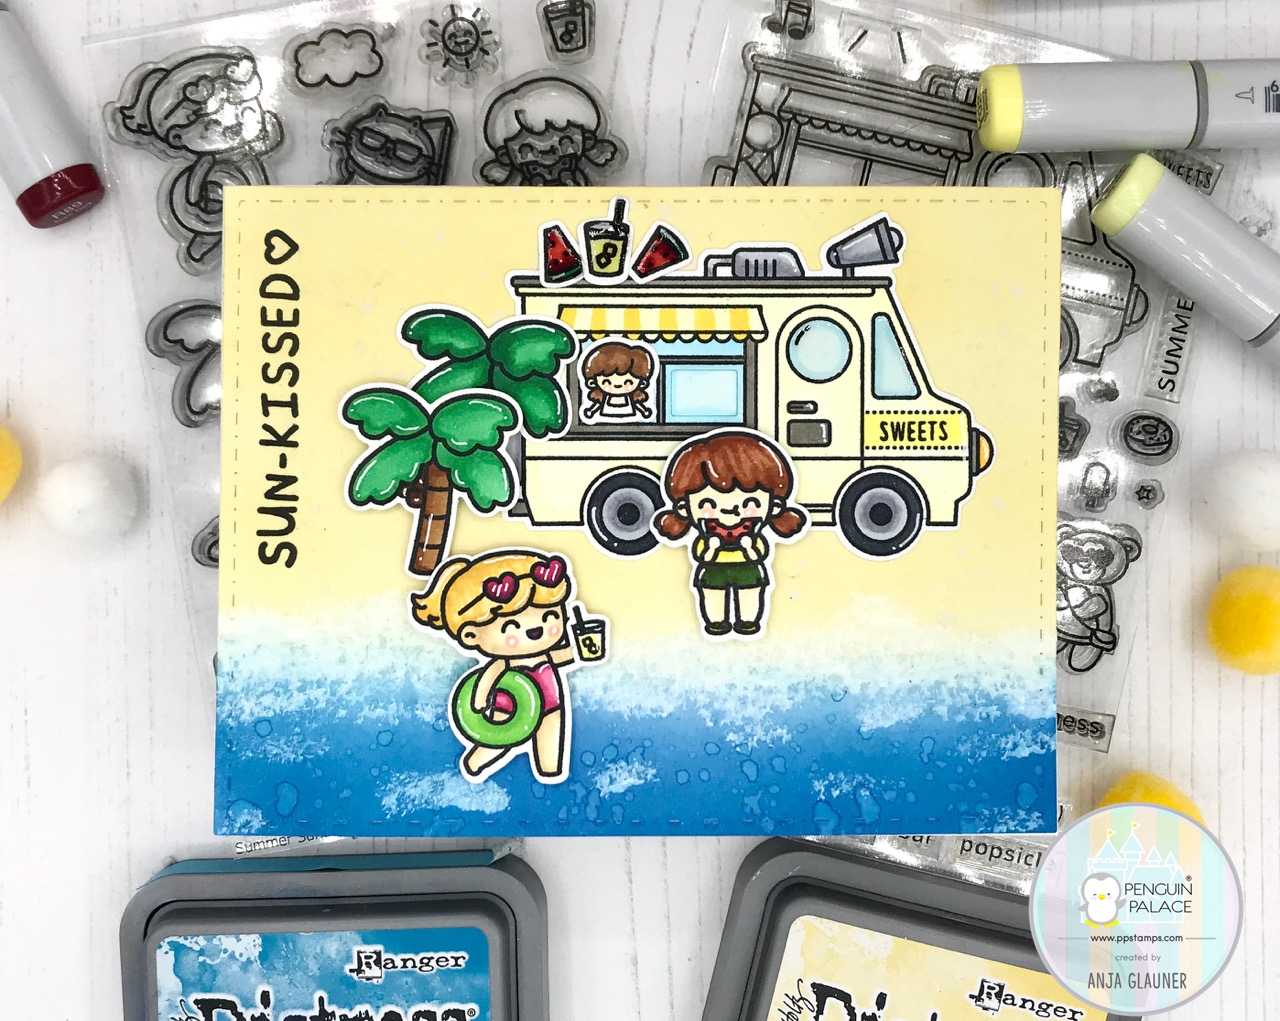
Today I'm sharing another card with Penguin Palace. I combined two stamp sets: the new The Sweetest Truck stamps and coordinating Penguin Perfect Cuts and the Summer Sunshine stamp set and coordinating Penguin Perfect Cuts!


To start, I made a sketch of my card to find out what stamps it should become. Then, I stamped the images and colored them in with my Copic Sketch markers. I die cut them with coordinating Penguin Perfect Cuts.


Next I created the background. I die cut an A2 sized panel with the Dots Meet Dashes Large Rectangle Overlay die and ink blended scattered straw Distress Oxide ink for the beach and mermaid lagoon Distress Oxide ink for the ocean. I splatterd some water onto the ink blended card base and soaked it up with paper towel. For the realistic look of the ocean I dabbed white acrylic paint with a bristle brush. I love this effect!


Then, I adhered my images with a mix of liquid glue and foam tape to my card. I added highlights to the images with a white gel pen and Glossy Accents to the windows of the truck and the watermelons and the drink on top of the truck roof.


I hope you like my card!


Thanks for stopping by and happy crafting!

Anja
If you like this post, be sure to follow my blog! (Buttons are in the sidebar on the right.) ♥
Donnerstag, 7. Mai 2020
- Werbung - 
Hi there!

Today I'm sharing a new encouragement card featuring stamps and dies from Penguin Palace.
I used the Classic Diamonds Backdrop stand-alone die and the My BFF stamp set. I also used the large Dots Meet Dashes Rectangles and the small Dots Meet Dashes Rectangles.
Here is a look at my card:


First I die cut white cardstock with the Classic Diamonds Backdrop die and then, die cut this portion again with the large Dots Meet Dashes die.


Next I die cut watercolor paper with one of the small Dots Meet Dashes dies and stamped the rainbow and the little butterfly from the BFF stamps with VersaMark. I embossed them with white embossing powder. The rainbow is perfect to encourage someone in these times.


Then I colored them in with Zig Clean Color Real Brush Marker. That took more time than I thought because of the little images. I also colored the area between the stamped images with a light yellow Zig marker.


Next I die cut the word "hope" with some alpha dies. I die cut each letter three times and glued them together to create more dimension.


I cut an A2 sized card base and glued the Diamonds Backdrop onto this card base. Then I adhered the word "hope" and applied a piece of yarn. Then I adhered this panel with foam tape.


I hope you like my card!

Thanks for stopping by and happy crafting!

Anja
If you like this post, be sure to follow my blog! (Buttons are in the sidebar on the right.) ♥

@stampinanja

Latest Pins